Stop Struggling: The Secret to Using SharePoint List Images for Serious Business Apps
If you’ve ever tried to manage images within a standard SharePoint List, whether you’re building a beautiful Intranet site or setting up a robust data source for Power Apps Canvas applications, you’re probably aware of the pain this can cause. The older legacy approach was never as straightforward as it should be and while its certainly much easier now, there are still a number of steps necessary to manage Image fields for downstream tasks. I’m not talking about just displaying them; what happens when your business needs to extract, collect, or process images for linked business processes, for example consolidating digital receipts for an employee expense application? Well that was the problem I faced for a HR Employee Canvas App.
By Incorporating the use of Power Automate there is a way around this. Obviously you could have a administrator simply copy the images manually and paste them into a OneDrive folder or locally but that wouldn’t be particularly efficient and lets face it automation is the name of the game nowadays. This blog dives deep into the specific strategy I created to build an accounting process for images saved for employee expenses into a SharePoint List.
Now I know some will say why use SharePoint in the first case and when it comes to performance and data volumes they could be right, but its not always the case and smaller companies:
- Generally do not create large volumes of data
- Will want to avoid the additional charges that comes with databases and DataVerse. So the following blog focuses on using SharePoint data alone.
For those looking for a bit of background knowledge first:
The Legacy Ways of Storing Images
Before the dedicated Image column, developers and users had to rely on a few different workarounds to include images within a SharePoint list item:
1. Hyperlink or Picture Column (The Most Common Legacy Method)
- How it Works: This column type did not allow you to upload a file directly. Instead, you had to first upload the image to a Document Library (or a special Picture Library) somewhere else on the site.
- The Data: The list column would then only store the URL (link) pointing to the location of that image file.
- The Pain Point: This required two separate steps and two different locations: one for the list item data, and one for the image file. If you moved the image file, the list item broke. This is likely the “not always straight-forward” scenario you were referring to for your Canvas Apps.
2. Attachments
- How it Works: You would use the default Attachments feature (Still available) on the list item to upload the image file.
- The Pain Point: Attachments are difficult to work with outside of the standard SharePoint form, especially if you need to display them as thumbnails in a view or easily reference them in Power Apps/Power Automate. You had to use flows (Power Automate) or code to extract the file and get its actual URL to use it.
3. Rich Text Column
- How it Works: A multi-line Text column configured for Enhanced Rich Text allows users to embed images directly into the text field.
- The Pain Point: This can be messy. The image was embedded as HTML data, which was not easy to manage, extract, or use in other applications.
The Image column solves some of the integration problems of the past by making image storage and retrieval a single, native list field experience. So while the image column type isn’t new it did introduce some useful ways for image management.
Direct Upload: It allows users to upload an image directly to a list from a computer or device.
Native Integration: The image is stored behind the scenes in a way that is easily accessible and displayable, and it generates the complex JSON that developers can use.
Modern Experience: It’s also designed to work seamlessly with Power Apps, Power Automate, and modern SharePoint views.
Lets define the business problem for this blog:
In the following scenario I use:
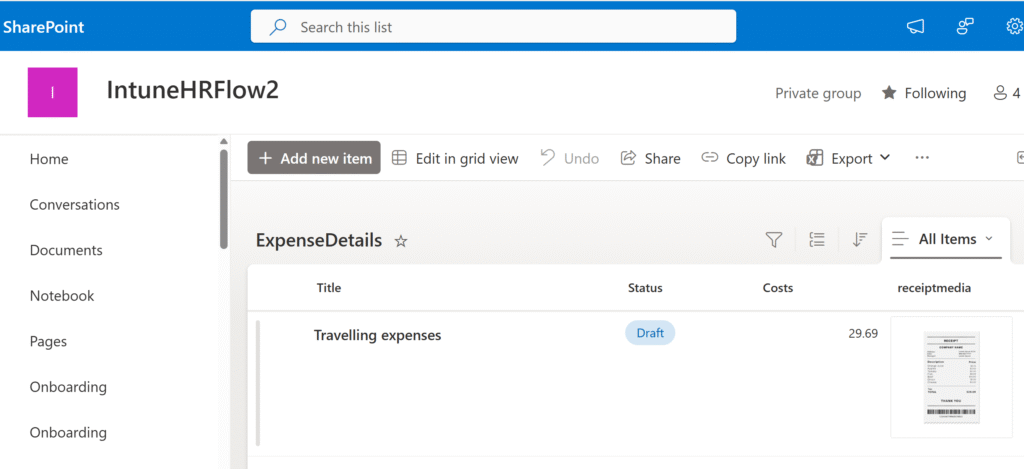
- A SharePoint List – Including two Lists ‘Expenses’ and ‘ExpenseDetails’. The ‘ExpenseDetails’ List includes an Image field storing the employees saved receipts for submitted company expenses.
- A Power Automate scheduled flow – Used to query and extract these SharePoint images which are then used for weekly submissions to HR, Finance and accounting.
The challenge is to automate the collection of all SharePoint Images submitted as part of expense claims, save them to a OneDrive Location as well as an updated list of expense lines raised and finally email HR and accounting every week to ensure the correct data is saved and verified for tax and payment to the employee.
At a high level we can create a scheduled Power automate flow to run every Friday which queries the two SharePoint Lists, extracts the Images and saves them to a OneDrive folder, then email HR/Accounting with the details for submission. But how is this achieved ?
Below we have four pictures,
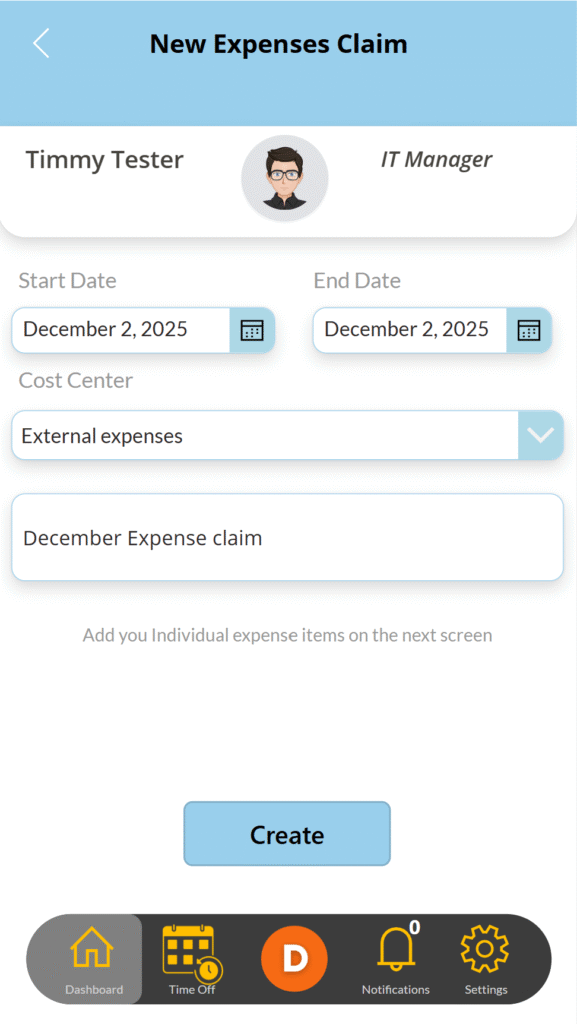
- 1 – The Expenses mobile Application used to create the Expense claim, then
- 2 – The screen used to add the claim details including adding the associated expense photo of the receipt,
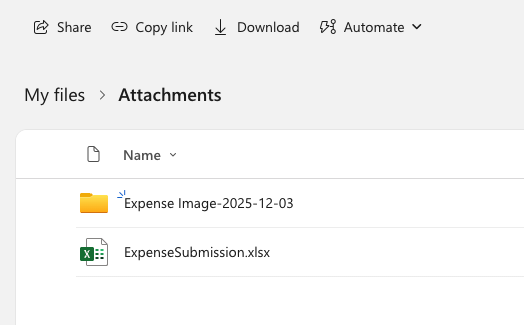
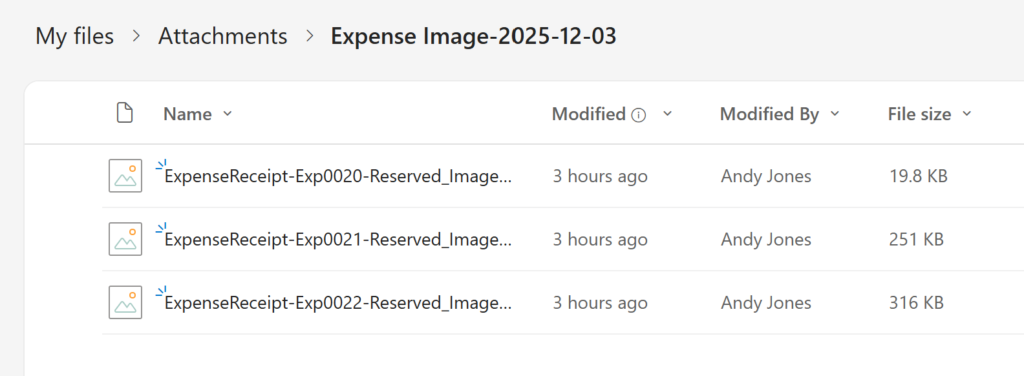
- 3- A screen shot of the OneDrive folder showing the new folder created with the saved Expense Images & ExpenseSubmission document (which includes a list of the updated expenses raised) and lastly
- 4 – A view of the SharePoint list with an added receipt used for the automation flow.
As we have the SharePoint List as our data source lets start with the Power Automate flow. As mentioned previously the benefit of using SharePoint List means anyone with a Microsoft 365 license be it Business Standard or Business Premium qualifies for access to SharePoint and Power automate. Now there some dependencies here:
- You can only use standard connectors – Luckily SharePoint is a Standard Connector and so is Outlook, Teams, OneDrive, Planner, and many other core Microsoft 365 services.
- Power Automate actions count as API Requests. Your M365 license grants a daily request limit that, if exceeded, will throttle your flows – Which are fairly generous (Check out the latest restrictions here – Microsoft Learn )
To gain access to Power Automate for the first time without a premium license, you can sign up for free,
- Open Power Automate at https://make.powerautomate.com
- Click try for free (top right hand corner)
- Select ‘My Flows’, click ‘+New Flow’ and pick the Scheduled Cloud Flow
- Give it a name, I called it ‘Weekly Team Expenses‘ and schedule it to run 1 times a week, preferably on a Friday.
When complete this is where we define the actions for our flow to extract and manage our Images. The list of actions in the flow contains both standard connectors to SharePoint as well as SharePoint REST HTTP requests for which Ill explain. When I first created this flow I really thought I’d be able to just use standard actions BUT I soon discovered when you do that standard connectors do not discover the more complex properties of a list record – The key SharePoint list properties made available with a standard Power Automate actions like “Get items” or “Get item” that do not fully retrieve are those that store complex, nested data or large external objects. This includes Images, People, group columns and Lookup columns.
While this means its not as straight forward as I first thought we can overcome this by incorporating SharePoint HTTP REST API calls (defined below). Importantly It is worth noting that, initially in HTTP actions I thought I would have to create a registration within Azure for an Application and assign all the necessary permissions, then for each HTTP call create an access token for each HTTP request. BUT if this is the first time you are doing this the GOOD NEWS is, its not necessary.
By utilising a native SharePoint connector action and requesting SharePoint API calls your flow uses Delegated Permissions (The “On Behalf Of” Model).
- When the connector runs, it executes the SharePoint request “on behalf of” the user who created the connection.
- The system uses the permissions your user account already has in SharePoint. If you can read a list in SharePoint, the connector can read that list.
- Initial Authentication: The very first time you use a SharePoint connector in any flow, Power Automate prompts you to sign in to your SharePoint Online account. At this point, you are granting the Power Automate service (on behalf of your user account) the necessary permissions to access SharePoint.
This is different from creating an Application Registration in Azure AD for a direct HTTP call, which would require using Application Permissions.
On to the Scheduled Automated flow:
At a high level we can break down the sequence of this flow
Starting from the top the following breaks down the individual actions
- We set a scheduled recurrence to run once a week on a friday – The purpose being we want to collect on a weekly basis
- Initialise a variable to capture the total charges fro expenses raised
- Initialise a variable to hold the dynamic additions of each expense detail (Reference, raised by and amount). Each row is appended to the varaible which is added to an email at the end of the flow
- We then run a Get Items action against our SharePoint Expenses List – which holds the consolidated details to each claim, remembering each claim may have multiple expense lines (example December claim – line 1 – Travel expenses, Line 2 – Stationary expenses etc). The Get action contains a filter query ( Created ge ‘@{addDays(utcNow(), sub(0, dayOfWeek(utcNow())), ‘yyyy-MM-dd’)}’ and Status eq ‘Approved’ ) which finds expenses raised over the last week, from monday and where status = Approved.
- In this step we also initialise a new variable with a OneDrive folder path. This path will be the location of files made available to other people like HR or accounting using Share permissions. I called the new folder ‘Expenses – <todays date>’ – concat(‘Expenses-‘, formatDateTime(utcNow(), ‘yyyy-MM-dd’))
- Assuming there are expenses submitted and available a ‘Apply to each‘ loop allows you cycle through all of these and perform various actions against them, which include:
- We capture the amount being claimed in each claim
- Increment the ‘TotalAmountCharged’ variable with this amount
- Then check if the record contains any receipts i.e submitted Images by using a control action and testing if the ‘AnReceipts’ field retrieving is set to ‘Y’ or ‘N’.
Lets look at the records with Images
Where expenses contain receipts the flow of actions taken include:
- First we append details of the record to the string variable ‘emailbody‘ – which will be added into the email sent at the end of the flow
- Then with a compose action (which only works within the context of the loop) collect the field.Reference value
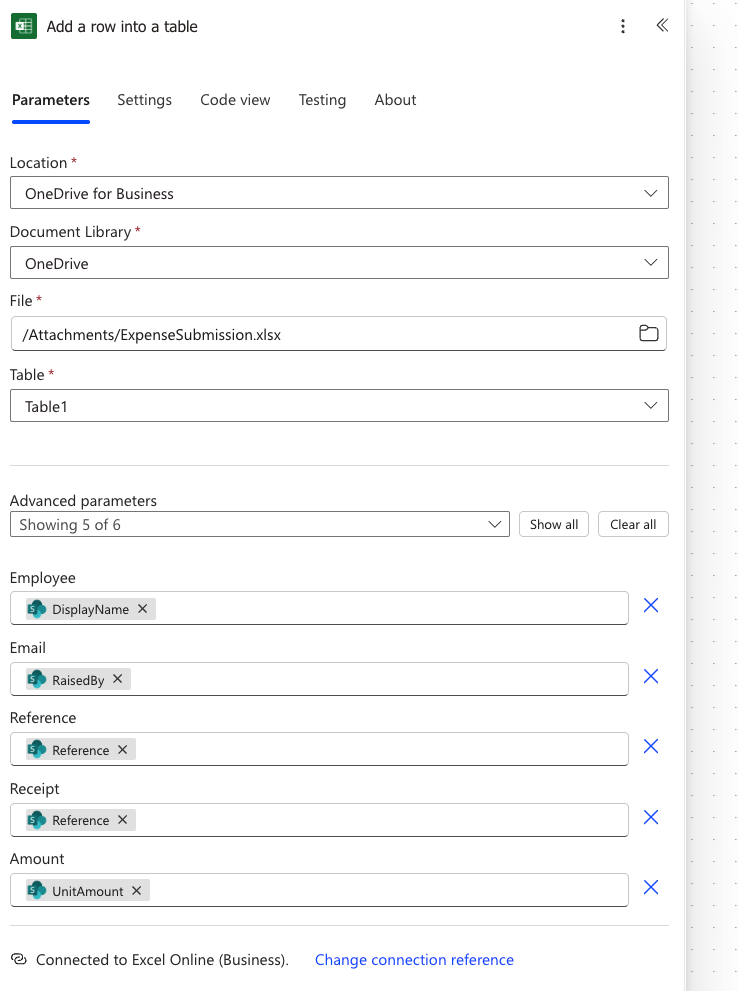
- We now add the captured details into an excel document ‘ExpenseSubmission’, again stored in OneDrive which contains a run down of all expenses raised as shown.
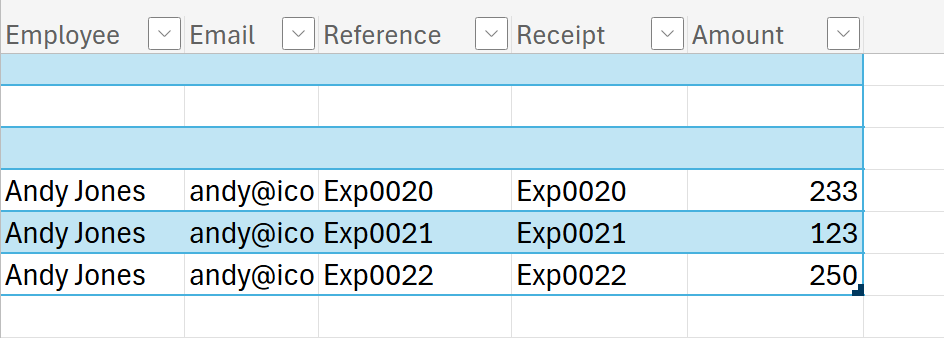
Please Note: The excel document must contain a table which I called ‘Table1‘ and is referenced within the Add to row action as indicated below.
Before we move on to the next section of the flow I want to fill in the gaps where an expense claim doesn’t have a receipt. When checking the status within the SharePoint record using a control action, if the AnyReceipts field = ‘N’ the flow carries out two actions:
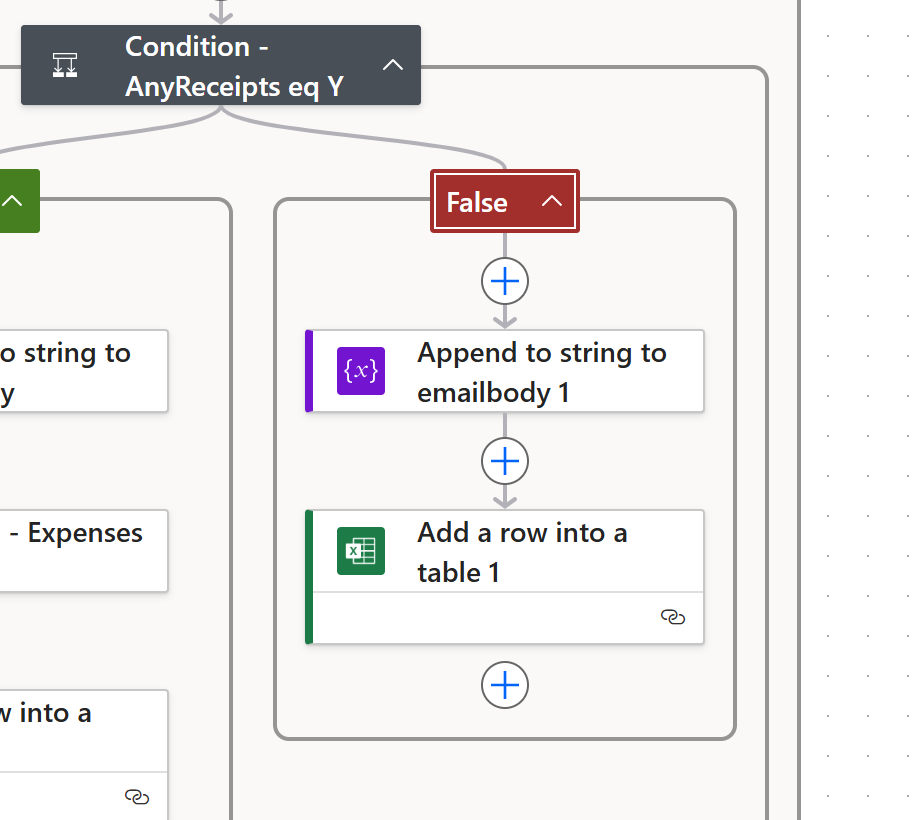
- Appends the record details to our ’emailbody’ variable (string) for the sending email
- Adds the information from the current record to the ‘ExpenseSubmission‘ excel document as before.
Part 2 of the flow
This next part of the flow is where things become interesting. Why, well this is where we run the HTTP API calls for SharePoint records that contain Images (receipts) stored in an image field. This is the core of the blog to highlight all the steps required.
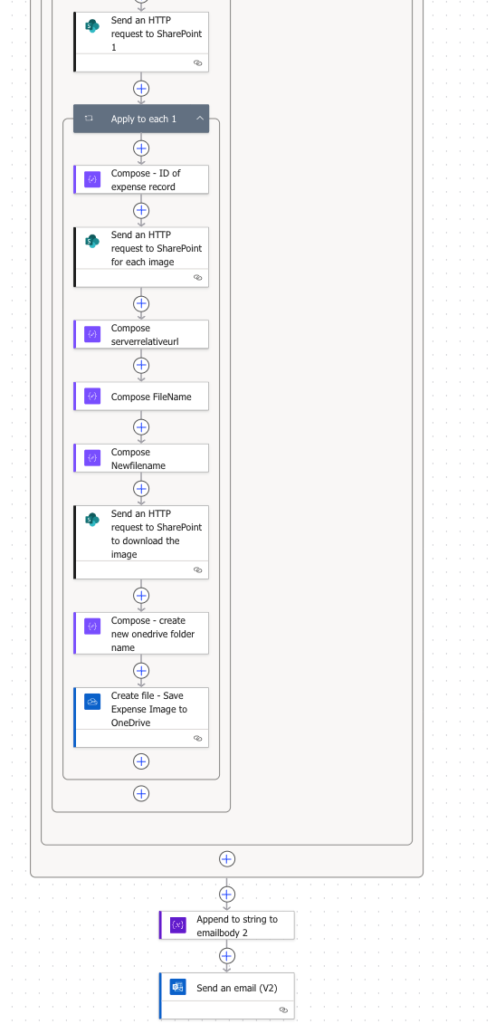
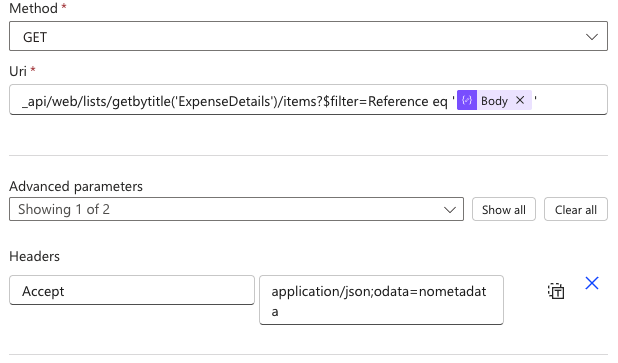
Our first SharePoint HTTP call uses a Get call to find rows within the ExpenseDetails SharePoint List – This list contains the 1 or more records associated with each expense claim raised. It uses the defined uri as shown below and must include the ‘Accept’ header. The dynamic variable shown is the captured reference value added to our ‘Compose’ action earlier and uses this to find ExpenseDetails unique to every Expense claim (each of which contain a unique field called reference). As you can see below a filter is included in the uri linking to to the Reference field.
With there being 1 or more Expense detail rows per Expense claim an ‘Apply to each’ loop is added to carry out actions against each – In this case it means drilling into the meta data of the field image with the goal to copy and save it to a share OneDrive location.
We first collect the ID of the expense record into a compose action, then use the ID of that record with a SharePoint REST API call. What the URI does is:
_api/web/lists/getbytitle(‘ExpenseDetails’)/items(@{items(‘Apply_to_each_1’)?[‘ID’]})/AttachmentFiles
/AttachmentFiles
Returns the collection of all attachment files on that item (file names, URLs, size, etc.).
/_api/web/lists/getbytitle('ExpenseDetails')
Targets the SharePoint list named ExpenseDetails.
/items(@{items('Apply_to_each_1')?['ID']})
Points to a specific list item by its ID, which you’re pulling from the current loop iteration with the Power Automate expression items('Apply_to_each_1')?['ID'].
In short: “for the current item in my Apply to each loop, the action takes its ID and address of the SharePoint item.” and fetches all attachments on that item.
This is the second HTTP call used to discover the required Image details. With this call we now have access to the ServerRelativeUrl needed as input to our final HTTP REST Call.
body(‘Send_an_HTTP_request_to_SharePoint_for_each_image’)?[‘value’][0]?[‘ServerRelativeUrl’]
As the Image file name saved with the Image object within SharePoint is often complex and unhelpful, we are collecting the registered name then appending ‘ExpenseReceipt-<Reference>-‘. This helps identify which Images are associated with the right Expense claim.
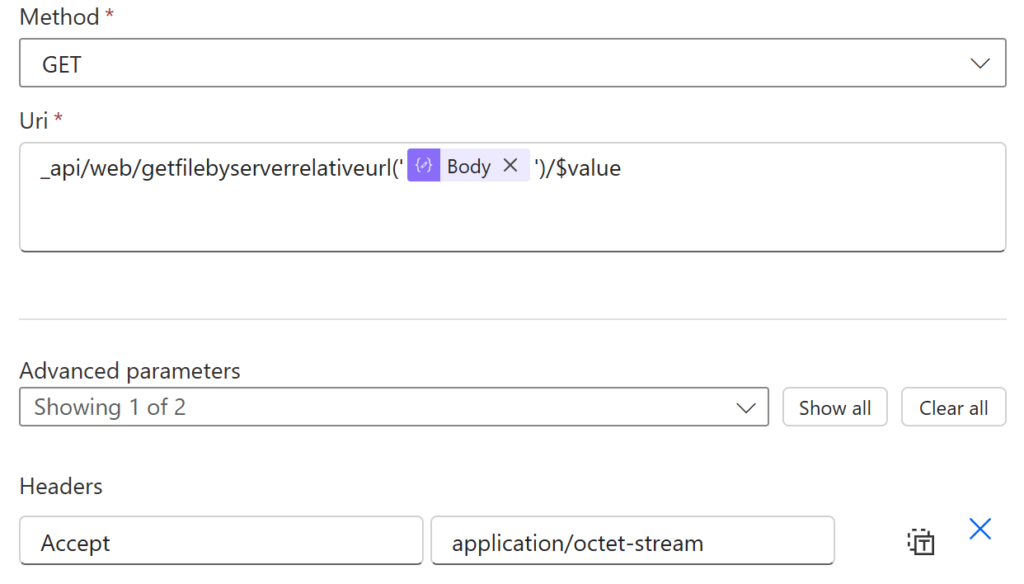
The third and final HTTP REST call retrieves the raw file content (binary stream) for a file, using the server-relative URL property you built earlier in your flow.
/_api/web/getfilebyserverrelativeurl('…')
Resolves a file object in the current site by its server‑relative path (e.g. /sites/Finance/Shared Documents/Receipts/Expense-123.pdf).
@{outputs('Compose_serverrelativeurl')}
Inserts the path produced by your Compose action. That must be the server‑relative path (starts with / and excludes domain/tenant).
/$value
Returns the file bytes (the content stream). In Power Automate, the HTTP action will surface this as the response body, which you can pass directly to actions like: AI Builder / custom processing steps / Create file / (OneDrive/SharePoint) /Send email (as attachment)
Finally we have the necessary details to download the Image for our reporting, phew. What we do with it now is determined by the process you need to follow. In my case I want to save it to OneDrive and make it accessible along with the details of each expense claim for accounting. We do that with a:
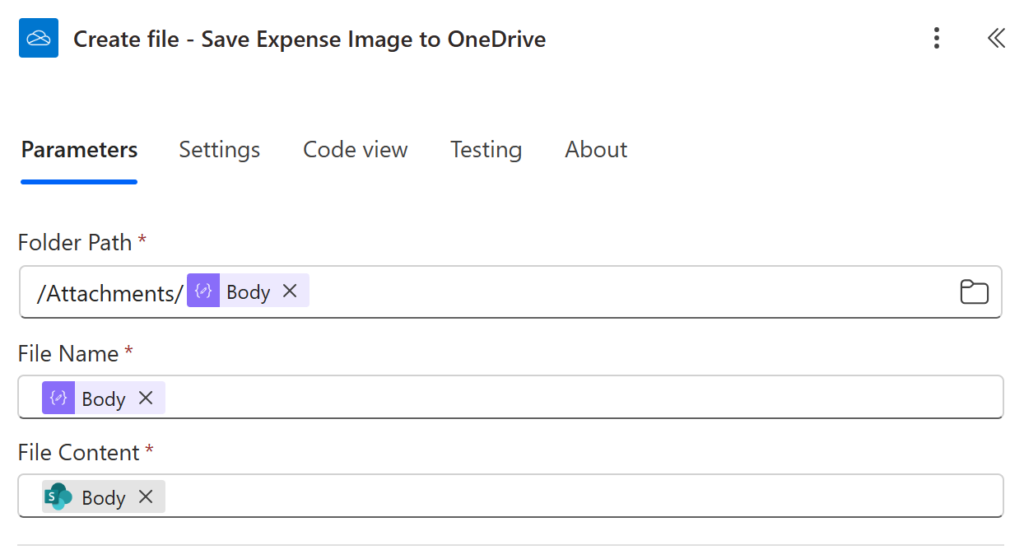
Create file action to OneDrive including the folder path, file name we created and the actual Image file itself.
The result of this is an updated excel spreadsheet with all the SharePoint expenses for the last week, a new folder created for the weeks Images (receipts) submitted including copied Images from SharePoint. (That’s assuming there are records and receipts to save).
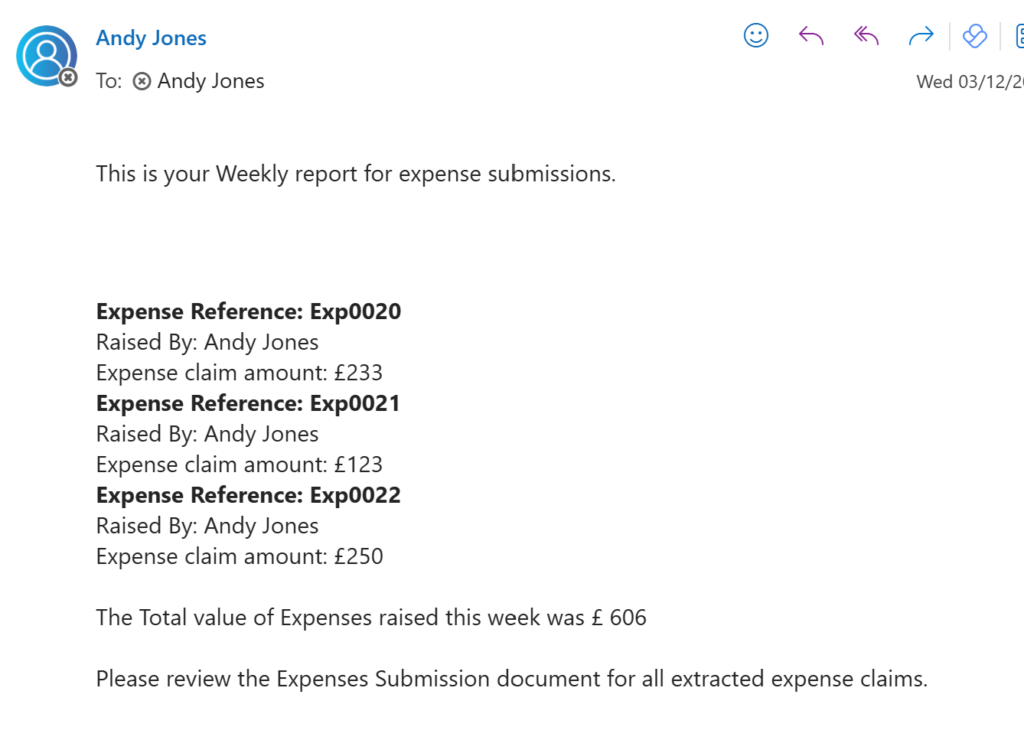
Our last step here is to send an email with a summary of the expenses as shown below.
That wraps up the full construction of the Power Automate flow to extract and save the SharePoint Image, which as I started out explaining is not the most straight forward process. Luckily it can be automated and once you’re there the application for this could be helpful for other applications.
If you’d like a copy of this flow it will be available to download in the coming days. Check out the IntuneHRautomation GitHub site dedicated to helping with everything automation around HR processes.