In the Intune update 2302 Microsoft released new functionality for Intune organisational messages by adding custom destination url’s. Now this may be a small change but actually it will make a difference as it means you can now include links to key information be it internal or external to the company’s network. This feature is great news as it simplifies the way IT Admins can communicate with company employees and represents a great step forward. At the time of writing this, the new feature is still in public preview and if you don’t have it in your tenant already wait until you receive release 2302. Take a look at the steps below to setup a message for your Windows 11 devices.
Step 1: Pre-requisites
To set this up there are some pre-requisites we need to get through first. You will need to make sure these are in place as without them you will not be able to send messages.
Version:
Messages are supported on devices running Win 11, version 22H2 or later managed by Intune
Licensing:
To deploy the organisational message feature you will require one of the following licenses:
Microsoft 365 E3 / Microsoft 365 E5 /Enterprise Mobility + Security E3 and Windows 10/11 Enterprise E3 /Enterprise Mobility + Security E5 and Windows 10/11 Enterprise E5
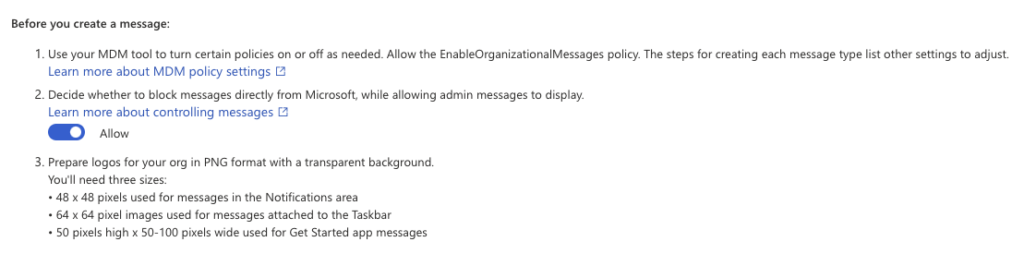
Logo requirements
Its worth noting that the Logos you add to your messages must meet the following requirements:
- PNG file
- Transparent background
- Size requirements:
- Taskbar messages: 64 x 64 pixels
- Notification area messages: 48 x 48 pixels
- Get Started app messages: 50 pixels long x 50 – 100 pixels wide
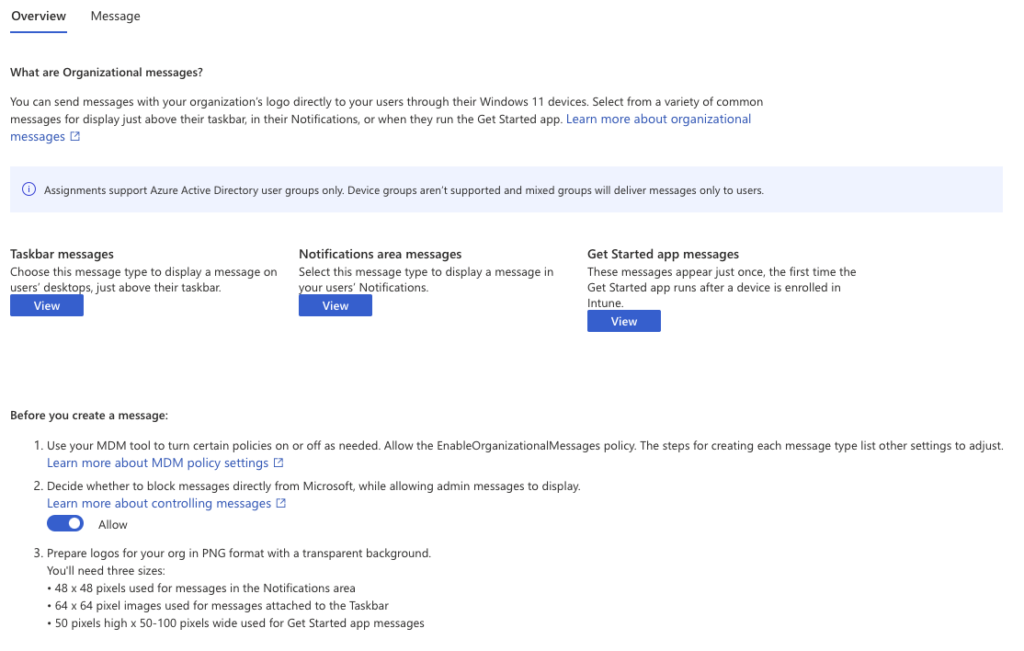
Organizational messages are configured from within your Intune Admin Center (Formally MEM) by following the steps below. There are three types of messages you can create, edit and monitor. These are:
There are also 2 main ways of configuring organizational messages, either use a Windows settings Catalog profile and add the necessary settings OR use a new or existing Device restrictions configuration policy. In this blog I have used the settings catalog as one of the ways as i actually I find this method easier to manage but you decide whats best for you.
NOTE: If you already have a security baseline policy please make sure you adjust the Windows spotlight policy to ‘Not Configured’.
Step 2: Policy requirements
Delivery policy
NOTE: This is required for devices running Windows 11, version 22H2, build 10.0.22621.900 and later.
First up, its important that you enable the delivery of organizational messages for all new and existing policies that are targeted at users and devices receiving organizational messages.
- Go to Devices > configuration Profiles >
- Click Create and choose Windows 10 and later
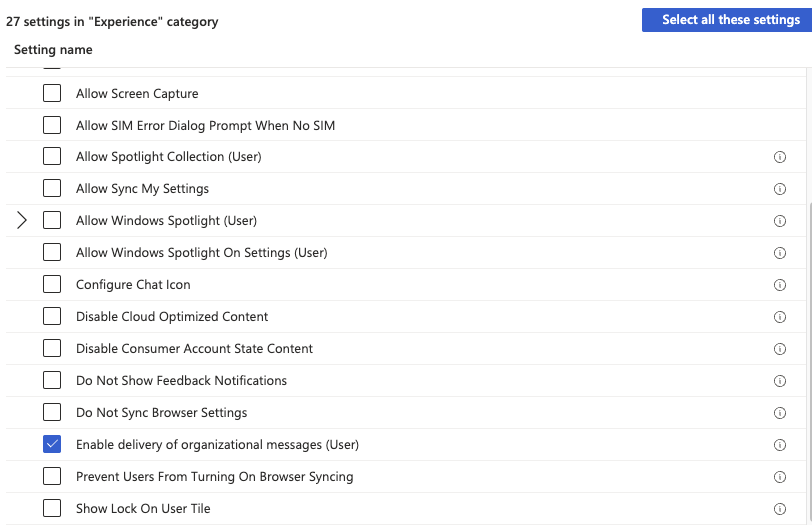
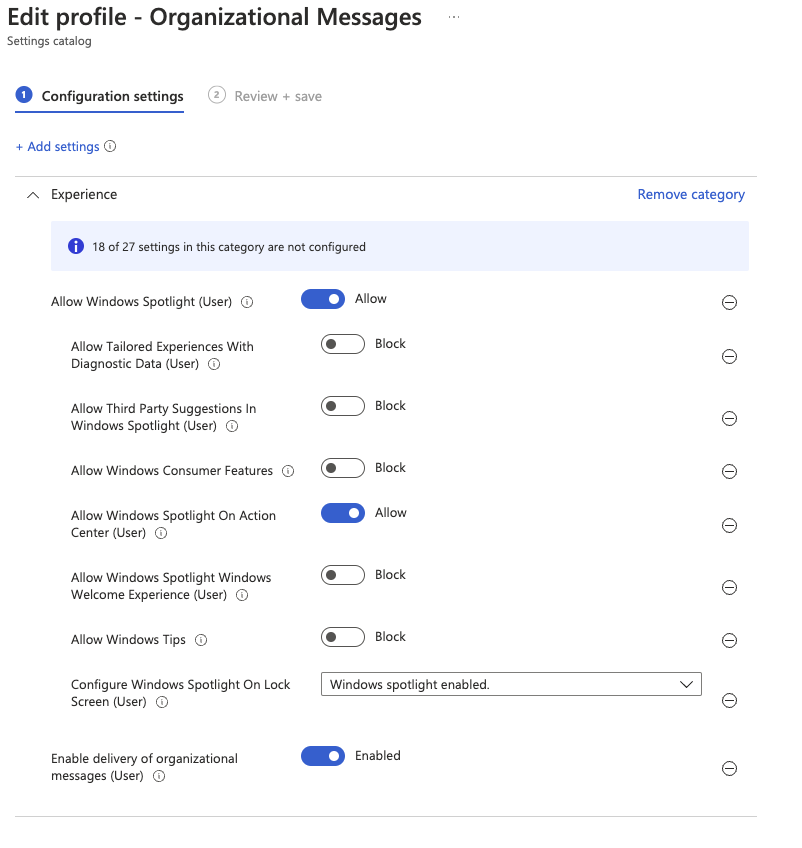
- Settings catalog > Experience > Enable delivery of organizational messages (User).
- Choose Settings Catalog under Profile Type
- Create your policy and find the Experience option.
- Check the Enable delivery of organizational messages (User), switch the toggle to Enabled.
- Keep this policy open for adding further settings.
Windows Spotlight Policy
For my configuration I used the Settings Catalog as its simple to just add these settings to the existing policy above. you may also want to separate these into a totally different and new policy. If you want to configure using a config Template have a look here.
https://learn.microsoft.com/en-us/mem/intune/remote-actions/organizational-messages-prerequisites?source=recommendations#template-profilesIn the same Windows configuration profile above, add the following settings and switch the toggles as shown below:
These settings can be found under the Experience category.
- To allow Notifications area messages:
- Check the option box for Allow Windows Spotlight (User): Close the Settings Picker and switch the toggle to Allow.
- Select and add Allow Windows Spotlight on Action Center (User): Switch the toggle to Allow.
- Click the Next button, select assignments then create the policy
Microsoft messaging policy
This may not apply head back on the organizational Messages pane
Go to Devices > Tenant Administration > organizational messages (preview)
If you currently block messages with your configuration you can still continue to do this but also allow organizational messages to come through.
Step 3: Create and configure a message for the notification area
Go to Tenant Administration > Organizational messages (Preview) and select the ‘Message’ tab
Check through the details provided on the Overview page to understand and learn about the options.
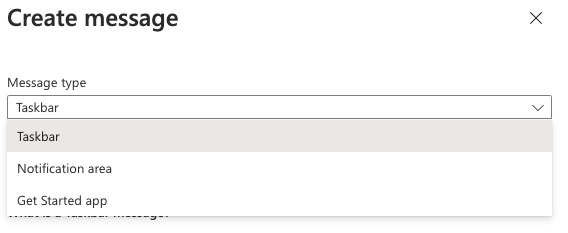
- Select Create.
- For Message type, select Notification area.
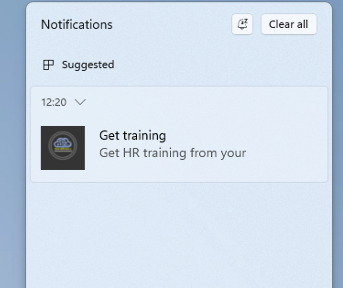
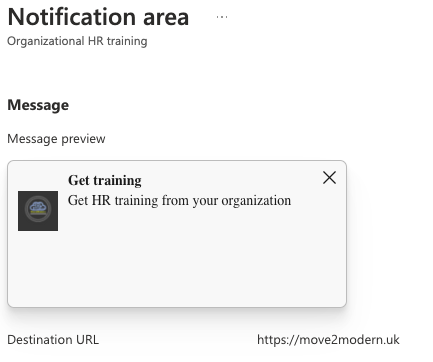
- For Message theme, select the drop down box and choose one of the themes. I chose Organizational HR Training but there are a few to select as per the image below. This type of message prompts employees within their notification area and when clicked should automatically open the URL configured.
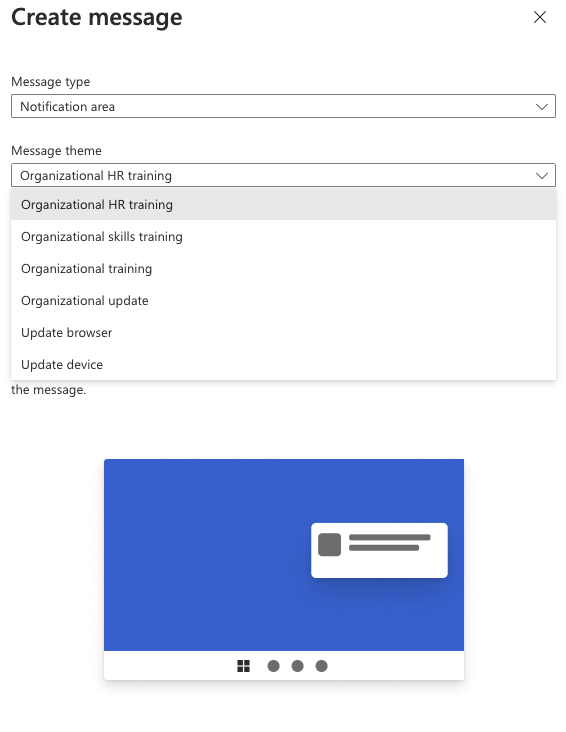
- Select the OK button.
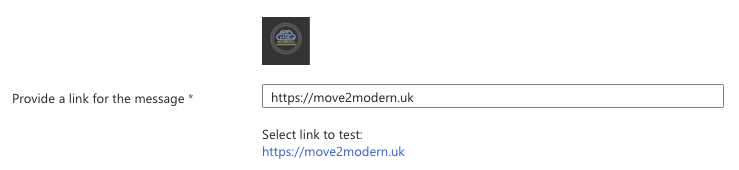
- Back on the Message page, select Add a logo, and then choose your image file. (see requirements above)
- (Optional) Now this is where you can Provide a link for the message: To include a URL link in your message:
- Enter your custom URL. Example:
Move2modern.uk - Select the added link to preview it and make sure it works as expected.
- Enter your custom URL. Example:
- Choose language to preview: Organizational messages supported up to 15 languages.
- Preview the message in dark theme: Choose this option if it fits with your message requirements. I kept mine as the default setting
Then select the start and end date as well as the frequency to the message by selecting the Next: Schedule at the bottom of the pane.
NOTE: You can’t leave these options empty and the end date has to be at least 7 days after the start date.
The final option is to assign to your user group. It has to be user/s groups as device assignments will be disregarded and the message cannot be created unless you add at least one group which is a different approach to other Intune policies. If you’re not ready to send out the message one way around this is assign an empty group at this point.
After you have created the message you can monitor and track all messages you have created including seeing whether they are active and how many times the url has been clicked and message shown to your end users.
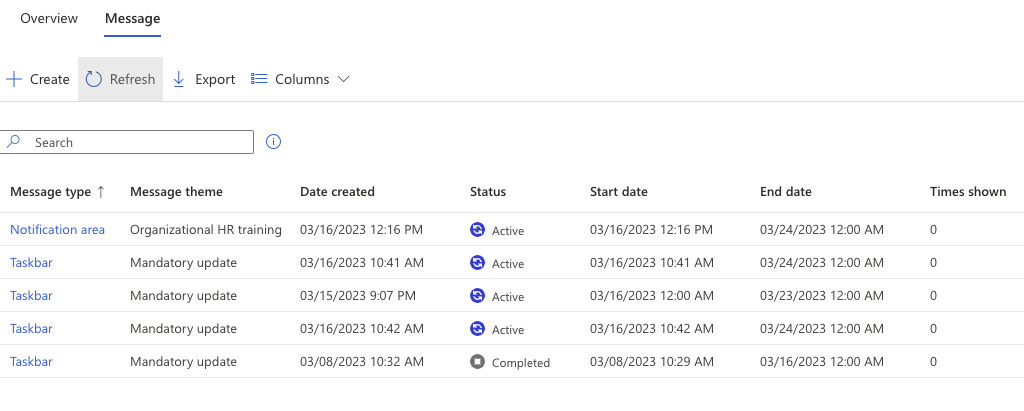
And thats it, once scheduled the message will be pushed to the configured users as shown in the notification area below.